Hi. this is next my tutorial for the Advanced IR from a Regular Photo. I hope you guys already read my previous article about Simple IR. At this point, I'm gonna have a new basic photo. Now let's start the tutorial. Almost forgot! I used photoshop CS3 to generate the effects.
1. I'm using this picture. Still the regular one but this one has more trees and green elements in it.
 |
| This is the original photo |
 |
| This is Simple IR |
3. Now I begin the advanced lesson. First go to Channel Mixer.
4. Go to Output Channel Blue. Slide it to these levels. Red=33, Green=33, Blue=34
 |
| Blue Channel Mixer |
5. This is what happened after applying Blue Mixer
 |
| Applying Blue Mixer |
7. Press Ctrl+Alt+Shift+E, this will create new flatten layer that include all the effect made before. Changed the blending from Normal to Screen. Adjust your opacity level so it's not to bright.
 |
| Screening Applied |
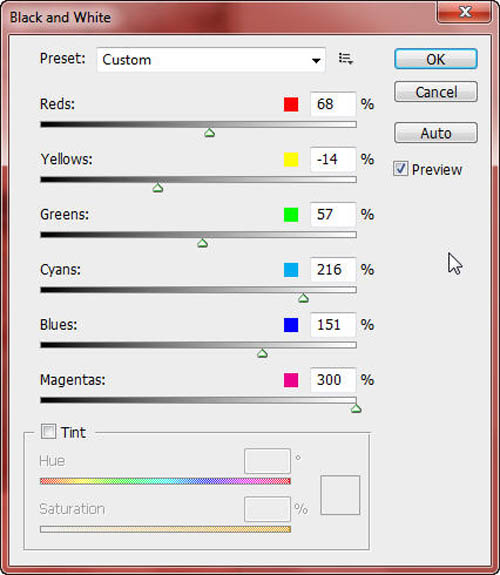
8. Add the Black and White layer. The main point is adjusting the magenta to the max. You can try adjusting the other sliders.
 |
| Black and White layer setting |
9. Now set the blending of Black and White layer to Luminosity. You can adjust the opacity level.
 |
| Black & White Added |
Done! You've just completed timur's tutorial on making infrared picture from the regular one. After doing step number 9 you can add other effects to make it a more artistic picture.
No comments:
Post a Comment